Hardware Auto Size
PRO-TECH TITAN can automatically set the size of some hardware items in your project.
Hardware Types
The following hardware types can be sized by PRO-TECH TITAN.
Preparing to Use Auto Size
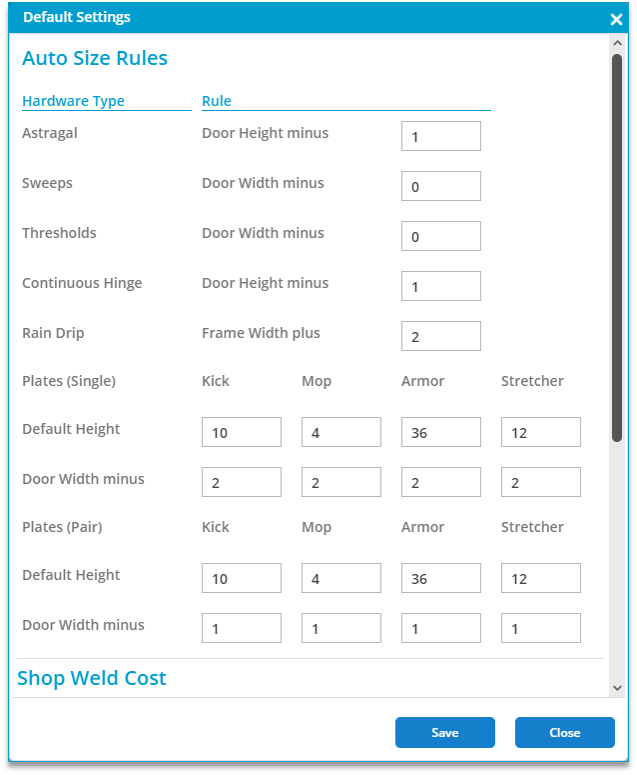
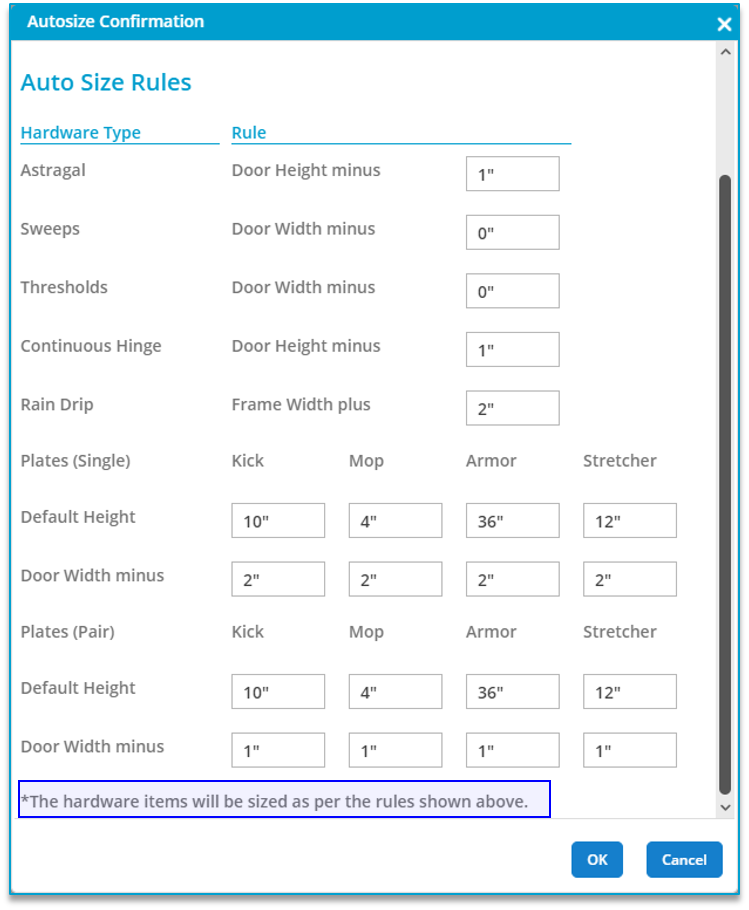
Auto Size applies rules that you define to create a properly sized hardware item.
You set these rules for your project under the Utilities tab, "Default Settings."
The initial settings for these rules are maintained in your Company Default Settings.
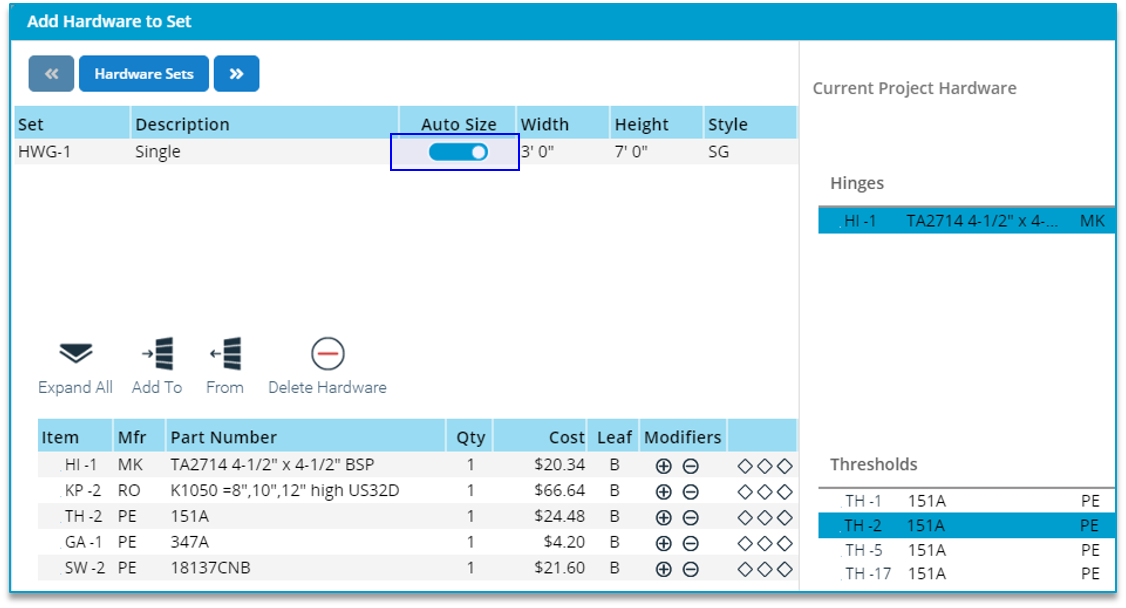
You can control which hardware sets that PRO-TECH TITAN will auto size for you.
By default, PRO-TECH TITAN will not auto size a hardware set. There is a toggle for each hardware set that controls whether or not PRO-TECH TITAN will auto size the hardware set.
Enabling Auto Size for a Hardware Set in the Hardware Set Editor:
Enabling Auto Size for a Hardware Set in the Hardware Set page:

Setting the toggle to the "On" position in either of these locations will enable PRO-TECH TITAN to auto size this hardware set.
Auto Size Results
During the Auto Size operation, PRO-TECH TITAN will:
Because of this, it is important that the Auto Size operation be performed infrequently within a project and at the most appropriate time - typically after your opening sizes and hardware sets content are complete.
Note that when Auto Size completes, your project will have new hardware sets and new hardware items.
Item numbers, such as "TH-2" (short codes) will change.
Auto Size Workflow
Following the steps listed here will provide the simplest and best results.
When creating and assigning hardware sets, focus on hardware set content. Before executing Auto Size, you should not need to configure hardware sets with identical content.
Examples
Example 1: Single Door Openings
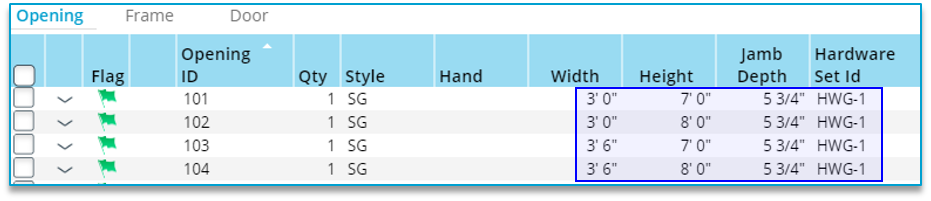
As a simple example, consider a single hardware set assigned to 4 openings of different sizes.
The hardware set contains 4 sizeable hardware items:

This hardware set is assigned to 4 openings of different sizes:
From the Hardware Page (Sets View) click on the Auto Size button:

You will be reminded of your current settings.
To change any of these will require clicking on "Cancel" here and navigating to the Project Utilities page and changing these in "Default Settings."
After clicking on "OK" here you will see this reminder:
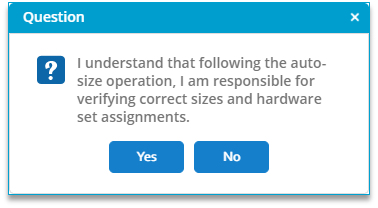
Clicking on "YES" here will start the Auto Size of Hardware Set contents."
Results
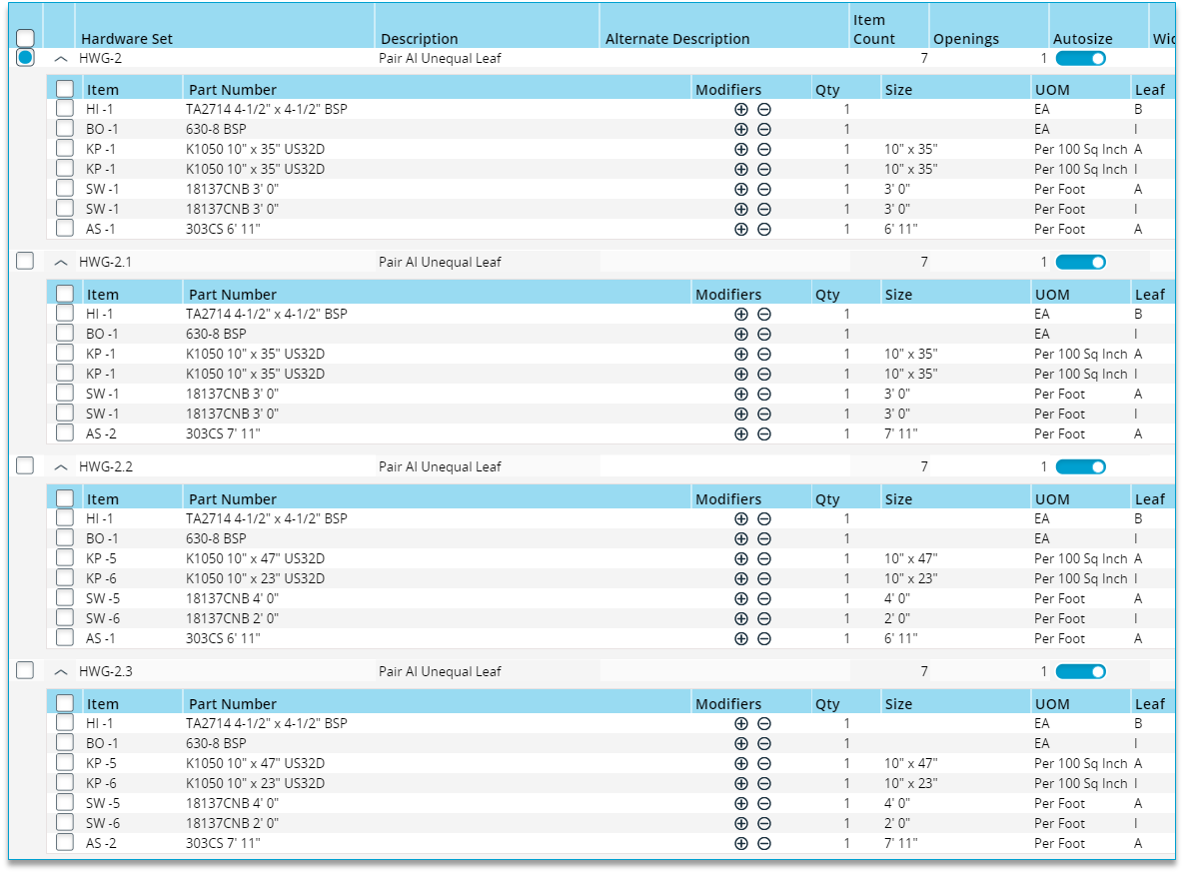
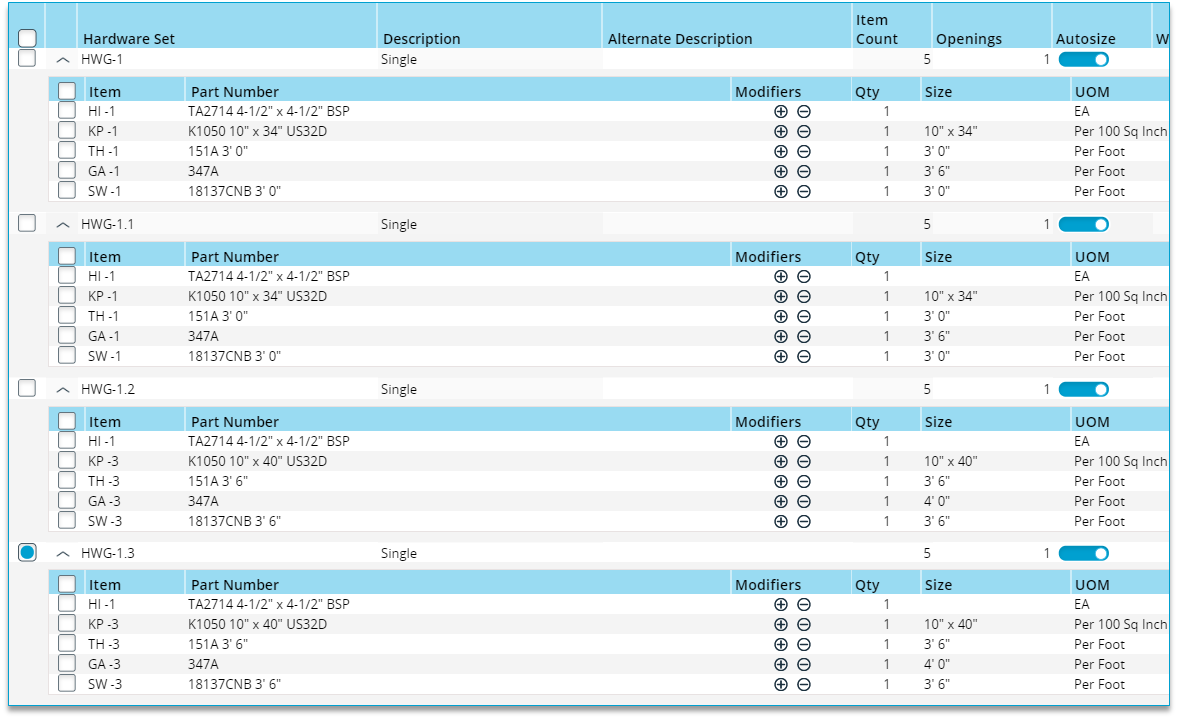
Initially, there was one hardware set assigned to 4 different sized openings (see above).
Following Auto Size, there are now 4 hardware sets:

Note the differences in the content of the 3 generated hardware sets:
At first glance, you might wonder why
In this case,
Example 2: Active/Inactive Pair Door Openings
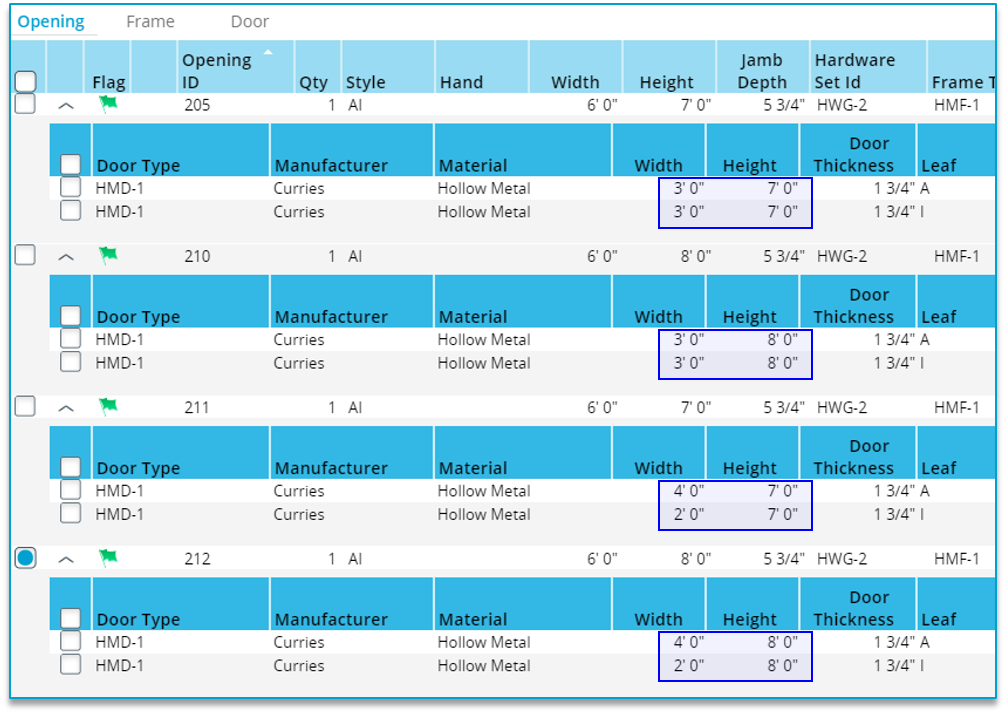
As another simple example, consider a single hardware set assigned to 4 active/inactive openings of different sizes.
The hardware set contains 5 sizeable hardware items:
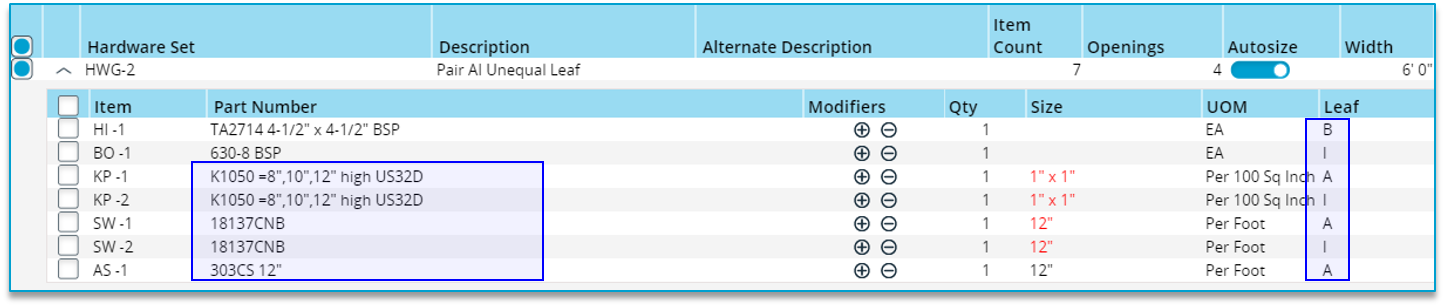
This hardware set is assigned to 4 openings of different sizes. Note that in some of these openings the active and inactive leafs have different widths:
Results
Initially, there was one hardware set assigned to 4 different sized openings (see above).
Following Auto Size, there are now 4 hardware sets: